


How to Fix Yellowed Pearls: Safe Home Methods That Work
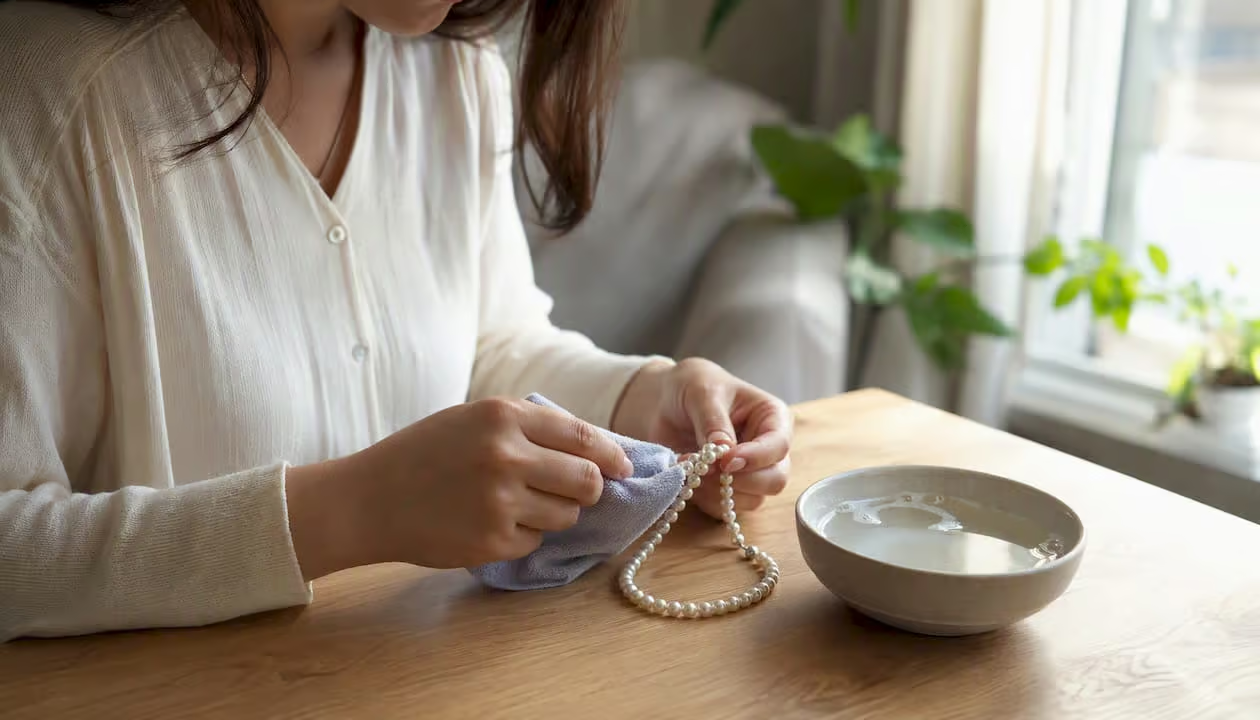
You can improve most pearl surface yellowing at home. The safest first step should be the gentlest. Start by wiping with a soft cloth before you reach for anything stronger. Then try these three steps below right now:
- Dampen a clean, lint-free cloth (microfiber or soft cotton) with plain water and gently wipe each pearl.
- If the yellowing persists, add one small drop of mild dish soap to the damp cloth and wipe again, then follow with a clean damp cloth to remove any soap residue.
- Lay the strand flat on a dry towel and let it air-dry completely before storing or wearing, allowing sufficient time for drying.
Stop here if the thread looks frayed, the nacre appears flaky or chalky, or the yellowing is deep and even across every pearl. Those are signs that DIY has reached its limit and a professional jeweler should take over. Always test any cleaning method on one inconspicuous pearl first, and never soak a strung strand.
Key Takeaways
Although most yellowed pearls can be improved with that gentle soap-and-water process, deep nacre damage, chemical etching, or frayed threads require professional attention before more involved attempts.
| Point | Details |
|---|---|
| Start with the gentlest method | A damp cloth with mild soap is the safe first step for surface yellowing on any pearl type. |
| Escalate cautiously | Move to baking-soda paste only for stubborn localized spots, tested on one pearl first. |
| Know the red flags | Flaking nacre, chalky texture, or deep uniform yellowing means stop DIY and see a professional. |
| Prevention beats restoration | Wipe after every wear, store in breathable pouches, and wear pearls regularly to slow dehydration. |
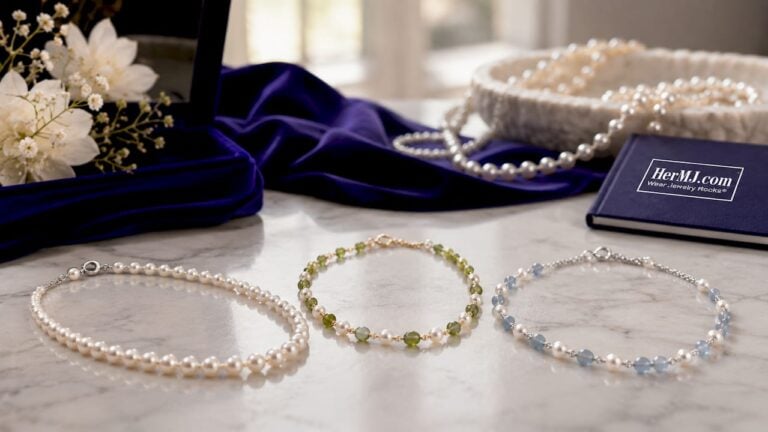
| HerMJ freshwater pieces | HerMJ’s artisan freshwater pearl jewelry is designed for gentle, consistent care using the conservative methods in this guide. |
Why do pearls turn yellow in the first place?
Pearls are organic gems, formed layer by layer from nacre, and that biological origin makes them uniquely susceptible to environmental change. Understanding what causes yellowing helps you choose the right remedy and avoid making things worse.
- Nacre dehydration. Nacre contains water and organic proteins. When pearls sit unworn in airtight containers, they dry out, and the surface takes on a dull, yellowish cast. Wearing pearls periodically supplies natural skin oils that help preserve nacre moisture and slow this process. Paradoxically, locking them away accelerates the very problem you’re trying to prevent.
- Body oils and cosmetics. Skin oils, lotions, foundation, and hairspray deposit a thin film on the nacre surface. Over time, that film oxidizes and yellows. This type of discoloration is usually surface-level and responds well to gentle soap cleaning.
- Chemical exposure. Perfume, chlorine, ammonia-based cleaners, and acidic substances don’t just coat nacre. They etch it. Chemical etching can be permanent, which is why the order of getting dressed matters so much.
- UV light and heat. Direct sunlight and heat sources (radiators, car dashboards, bathroom vents) accelerate the breakdown of nacre’s organic proteins, producing a yellowed, sometimes brittle surface.
- Improper storage. Airtight plastic bags trap moisture and chemicals while simultaneously starving pearls of the humidity they need. Fabric-lined pouches or jewelry drawers are far better.
- Age-related changes. Antique and vintage pearls may show deep, even yellowing from decades of organic change. This kind of discoloration often can’t be fully reversed at home.
Pro Tip: Before cleaning, hold the pearl under good light and look closely at the surface. If the yellow is patchy or concentrated near the drill holes, it’s likely surface grime. If it’s uniform and deep, chemical damage or aging may be the cause, and aggressive DIY cleaning won’t help.
How to fix yellowed pearls safely, step by step
The guiding principle here is conservative escalation: start with the gentlest method that addresses the problem, then move to a cautiously stronger local treatment only if it’s needed.
This sequence is recommended by multiple jewelry care sources, and it’s the approach I trust for artisan freshwater pieces.
Method A: Gentle soap and water (first-line, all surface yellowing)
This is your starting point for any yellowed pearl, regardless of type or age.
- Fill a small bowl with lukewarm water and add one drop of mild, pH-neutral dish soap or baby shampoo.
- Dip a soft, lint-free cloth into the solution and wring it out so it’s barely damp, not wet.
- Wipe each pearl individually with light, circular strokes. Don’t scrub.
- Rinse the cloth with clean water, wring it out again, and wipe each pearl a second time to remove soap residue.
- Lay the strand flat on a dry towel. Do not hang it. Allow pearls to air-dry completely before storing.
Gentle soap and water is the recommended DIY approach for mild surface yellowing, and for many pieces it’s all you’ll ever need.
Method B: Diluted baby shampoo for moderate surface buildup
If a single soap-and-water pass doesn’t shift the yellowing, a slightly more concentrated baby shampoo solution can help. Mix two drops of baby shampoo into a small bowl of lukewarm water.
Use the same damp-cloth technique from Method A, spending a few extra seconds on each pearl. Rinse thoroughly. This method is still gentle enough for freshwater pearls and most cultured saltwater varieties.
Method C: Baking-soda paste for stubborn, localized spots
This is a spot treatment only, not a full-strand cleaning method. Mix a tiny amount of baking soda with just enough water to form a thin paste. Apply a pea-sized amount to a soft cloth and gently rub one pearl in a small circular motion for no more than 10–15 seconds.
Rinse immediately and thoroughly. Test on a single pearl first and wait 24 hours before treating the rest. Use baking soda treatments with great care and only in extreme cases, as baking soda is mildly abrasive and can wear nacre if overused. Read this entire article before attempting this (or any other) process.
Method D: When to stop DIY entirely
Don’t attempt any further cleaning if you notice peeling or flaking nacre, a chalky or powdery surface texture, deep and uniform discoloration that two gentle attempts haven’t shifted, or if the strand’s thread feels weak or shows visible fraying.
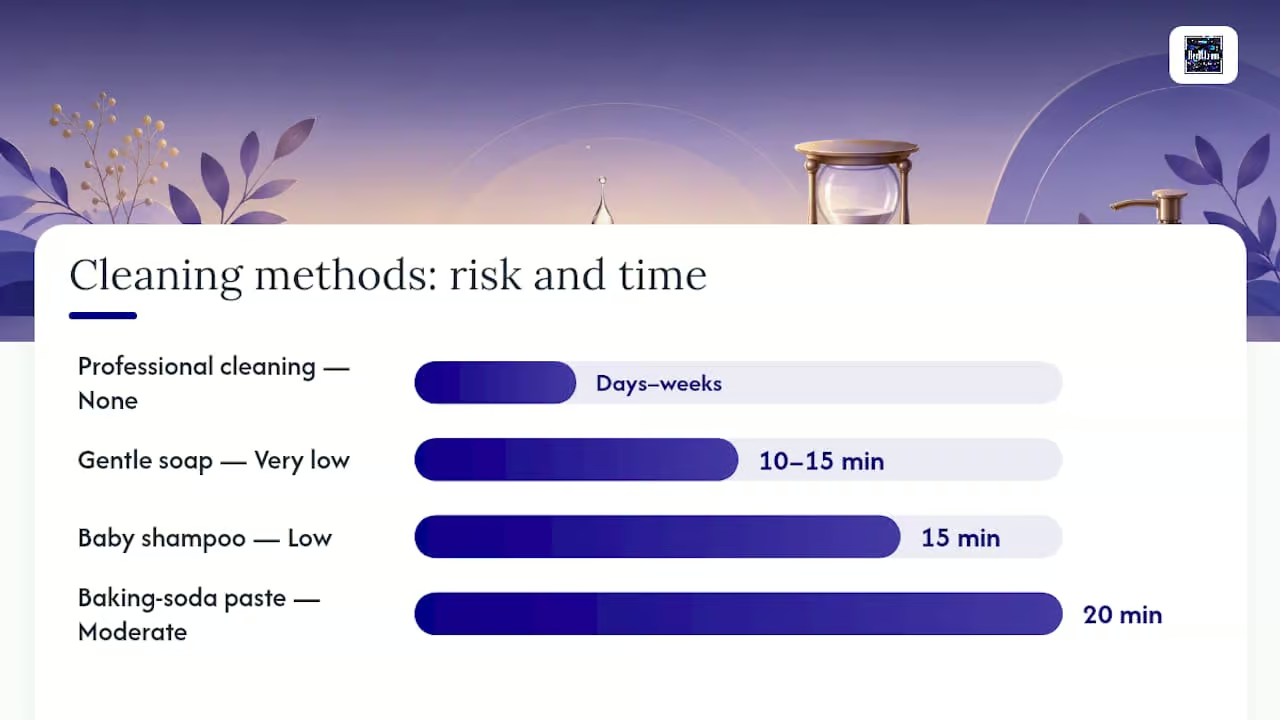
| Method | Best for | Risk level | Time needed |
|---|---|---|---|
| Gentle soap and water | Light surface yellowing, all pearl types | Very low | 10–15 minutes |
| Diluted baby shampoo | Moderate surface buildup | Low | 15 minutes |
| Baking-soda paste (spot only) | Stubborn localized spots | Moderate | 20 minutes |
| Professional cleaning | Deep discoloration, nacre damage, antique pieces | None (for you) | Days to weeks |
Pro Tip: Always test on the least visible pearl on the strand, typically one near the clasp. Wait a full day before treating the rest. Nacre damage from a rushed test patch is permanent.
How to clean drill holes and clasps, dry pearls properly, and know when to restring
The details that most guides skip are often where things go wrong. Moisture trapped in drill holes, corroded clasps, and weakened silk threads cause more long-term damage than surface yellowing ever does.
- Cleaning drill holes. Use a dry, thin cotton swab to gently clean inside each drill hole. Don’t push liquid into the hole. If there’s visible buildup at the opening, a barely damp swab with one tiny drop of soap can loosen it, but follow immediately with a dry swab to wick out any moisture.
- Cleaning metal clasps. Wipe clasps with a damp cloth and mild soap, then dry immediately with a separate cloth. Metal and nacre have different cleaning tolerances, so keep your soap solution away from the pearl surface when focusing on the clasp.
- Drying correctly. Pat each pearl gently with a dry cloth, then lay the strand flat on a clean towel. Never hang a wet strand; the weight of the wet pearls stretches the silk thread and weakens the knots. Allow a full 24 hours of air-drying before storing.
- Restringing timeline. For pieces worn frequently, restringing every few years is a reasonable guideline. For occasional pieces, restringing less often may suffice, though visible fraying, stretched knots, or loose pearls always warrant earlier restringing. Pearl durability guidance from HerMJ recommends periodic inspection and restringing as part of a complete care routine.
Pro Tip: After cleaning and drying, hold the strand up to the light and look at each knot between the pearls. A knot that’s flattened, discolored, or has visible gaps is a warning sign. Catching a weak thread early costs far less than replacing lost pearls.
What you should never use on pearls
Some cleaning methods that work perfectly on harder gemstones will permanently damage nacre. This list is non-negotiable.
- Ultrasonic cleaners. The vibrations that make these effective on diamonds and metal settings can fracture nacre and loosen drill holes. Gem-care organizations explicitly flag mechanical and ultrasonic cleaning as too aggressive for organic gems like pearls.
- Steam cleaners. High heat and pressure force moisture into drill holes and can cause nacre to separate from the pearl’s nucleus.
- Bleach and ammonia. Both etch and discolor nacre on contact. Even diluted household cleaners that contain these ingredients are off-limits.
- Acetone and nail polish remover. These dissolve the organic proteins in nacre and permanently strip surface luster.
- Vinegar and acidic solutions. Acids dissolve calcium carbonate, which is the primary mineral component of nacre. Even a brief exposure can dull the surface.
- Abrasive cloths or brushes. Paper towels, rough fabrics, and toothbrushes all scratch nacre. Use only soft microfiber or lint-free cotton.
- Harsh baking-soda scrubs. Baking soda used incorrectly (too much, too long, on a dry surface) acts as an abrasive and removes nacre layer by layer.
- General household cleaners. Products like Windex, multi-surface sprays, and jewelry dips formulated for metal are not safe for pearls.
If you’ve already used one of these and the pearl surface looks dull, pitted, or discolored in a new way, stop all DIY cleaning and take the piece to a professional jeweler for an assessment.
Daily habits and storage choices that prevent yellowing
Prevention is genuinely easier than restoration. A few consistent habits will keep your pearls looking their best for decades.
- “Last on, first off.” Yes, this is my familiar mantra: put pearls on after applying makeup, perfume, and hairspray. Remove them before exercise, swimming, showering, or doing dishes. This single habit eliminates most chemical exposure.
- Wear them regularly. Pearls benefit from the natural oils your skin produces. Regular after-wear care combined with periodic wear helps preserve luster and slows the dehydration that causes yellowing. A pearl necklace worn once a week and wiped after each wear will outlast one stored in a box for years.
- Wipe after every wear. A quick pass with a soft, dry cloth after taking pearls off removes skin oils and light residue before they oxidize. For pieces worn frequently, a gentle soap clean every 3–4 wears is a good rhythm.
- Store in breathable pouches or fabric-lined drawers. Silk or velvet pouches, or a fabric-lined jewelry drawer, give pearls the gentle environment they need. Avoid airtight plastic bags, direct sunlight, bathroom storage (humidity swings), and placement near heating or cooling vents.
- Separate from harder gemstones. Diamonds, sapphires, and other hard stones can scratch nacre if they’re stored together. Keep pearl pieces in their own pouch or compartment.
- Mixed-material pieces need extra care. If your pearls are set alongside gemstones or metal, as in a Pearl and Aquamarine Necklace, keep cleaning solutions away from the metal settings and check that any gemstone-specific care advice doesn’t conflict with pearl care. When in doubt, the gentlest method that’s safe for pearls is the right default.
When should you take yellowed pearls to a professional?
DIY cleaning has real limits, and knowing when to hand a piece over is just as important as knowing how to clean it.
Signs that a professional is the right call:
- Nacre is visibly flaking, chalky, or powdery to the touch.
- The yellowing is deep, uniform, and hasn’t responded to two careful DIY attempts.
- The piece is antique, heirloom, or suspected to have a lacquer or coating from a previous restoration.
- The silk thread is frayed, stretched, or the knots have shifted.
- You’re unsure whether the pearls are natural, cultured, or imitation, which changes the cleaning approach entirely.
What professionals can do that you can’t:
Professional jewelers and pearl specialists have access to non-abrasive polishing compounds, enzyme-based treatments, and specialist equipment for controlled surface work.
In some cases, professionals can address surface-level nacre irregularities. They can also restring with fresh silk and properly sized knots, which restores both the look and the structural integrity of the piece. Artisan tools and professional techniques used in restringing are quite different from anything available at home.
Cost and timeline estimates (verify with your jeweler):
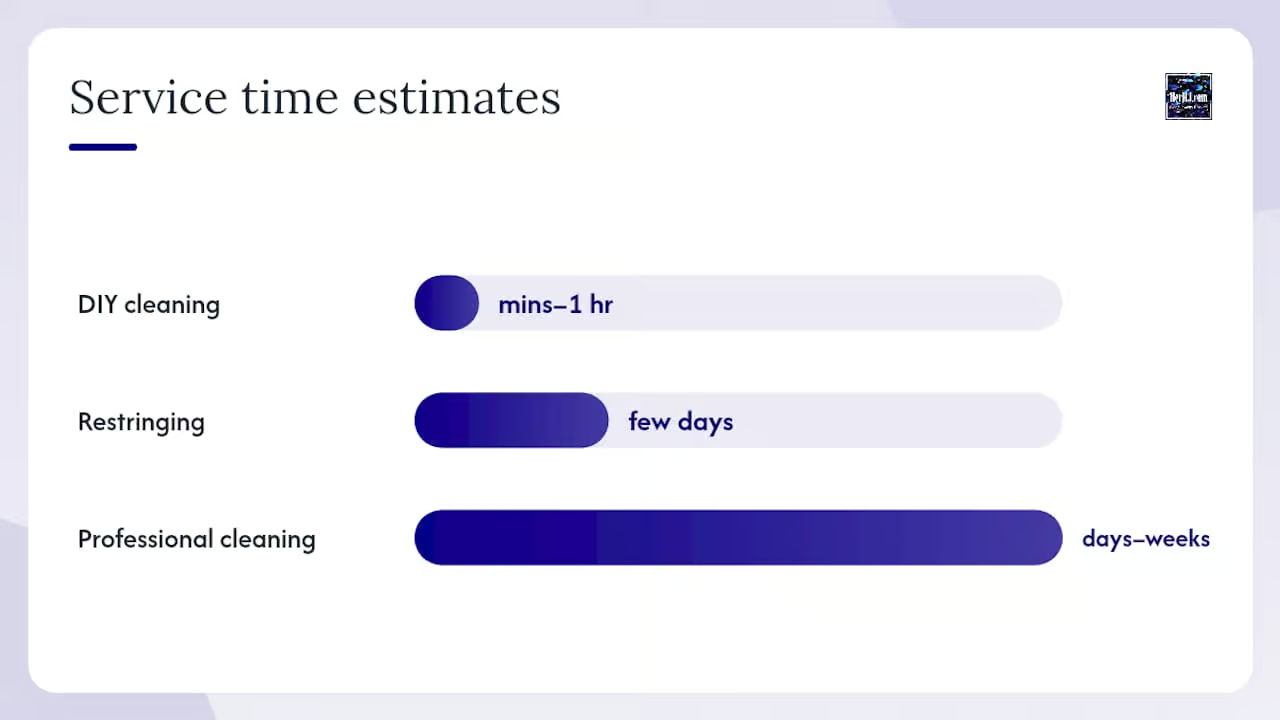
- DIY cleaning: minutes to an hour, minimal cost.
- Professional cleaning or restoration: typically a few days to a few weeks, depending on the shop’s schedule and the extent of the work.
- Restringing: usually a few days; cost varies by strand length and knot style.
Questions to ask before handing over your piece:
- Do you specialize in pearl restoration, or primarily in metal jewelry repair?
- What cleaning or polishing method do you use on nacre?
- Can you assess whether the nacre damage is surface-level or structural?
- Do you restring with silk, and do you knot between each pearl?
- What’s your timeline, and do you provide a written estimate?
Do freshwater and saltwater pearls yellow differently?
Yes, and the difference matters when you’re deciding how cautious to be with cleaning.
- Freshwater pearls are typically solid nacre, which sounds like an advantage, but they’re often thinner-walled and more porous than their saltwater counterparts.
They’re susceptible to surface yellowing from oils and cosmetics, and they respond well to gentle soap cleaning. Because of their porosity, they absorb cleaning solutions more readily, so rinsing thoroughly is especially important. - Saltwater pearls (Akoya, South Sea, Tahitian). South Sea pearls often have thicker nacre and different expectations for cleaning and restoration compared to common freshwater pearls.
Thicker nacre generally means more resilience to surface treatments, but it doesn’t make them immune to chemical damage or abrasion. - Akoya pearls are known for their high luster and thin nacre coating over a bead nucleus. They’re among the most delicate to clean because the nacre layer is relatively thin; even mild abrasives can break through to the nucleus quickly.
- Imitation or coated pearls (sometimes called “faux” or “simulated” pearls) have a glass or plastic core with a pearlescent coating. Cleaning methods safe for nacre can strip that coating entirely. If you’re unsure what you have, test on one pearl and wait 24 hours before proceeding.
Are yellowed pearls still worth restoring?
Surface yellowing that responds to gentle cleaning rarely affects a pearl’s underlying value in any meaningful way. Once the grime is gone, the nacre’s natural luster often returns, and the piece looks much as it did when new.
- Surface yellowing: usually reversible at home; doesn’t reduce value if the nacre is intact.
- Chemical etching or deep nacre damage: can reduce value significantly, because the structural integrity of the nacre is compromised and no amount of cleaning will restore the original surface.
- Antique or heirloom pieces: the patina of age can actually be part of the piece’s character and value. Aggressive cleaning of a vintage strand can remove that patina permanently, which may reduce its appeal to collectors.
When to get a formal appraisal:
- The piece is an heirloom or suspected to be vintage.
- You’re considering professional restoration and want to know if the cost is justified by the piece’s value.
- You’re unsure whether previous repairs or coatings have altered the pearls.
A reputable appraiser or trusted jeweler can assess nacre condition, identify treatments, and give you a realistic picture of restoration costs versus the piece’s current value.
If you’re comparing restoration costs against replacement, browsing HerMJ’s freshwater pearl jewelry collection gives you a clear sense of what comparable handcrafted pieces cost today.
A note from Veronique
I’ve seen a lot of beautiful pearl pieces come back from the brink with nothing more than a soft cloth and a drop of dish soap.
That’s genuinely encouraging.
What I’ve also seen is nacre that’s been stripped by well-meaning owners who reached for vinegar or a toothbrush because they’d read it worked on other jewelry.
Pearls aren’t other jewelry. They’re living gems, and they respond to care the way a fine piece of art responds to conservation: slowly, gently, and with respect for what’s already there.
My recommendation is to start conservatively, stay patient, and treat the test-patch step as non-negotiable. If you’re caring for a Lustrous Freshwater Pearl Bracelet or a delicate strung necklace, the gentle soap method is almost always enough.
And if you’re ever unsure, HerMJ’s care resources are there to guide you. For everyday styling ideas that also reinforce good wear habits, How to Style Pearl Jewelry for Everyday Elegance is a good next read.
Fresh pearls, handcrafted for you
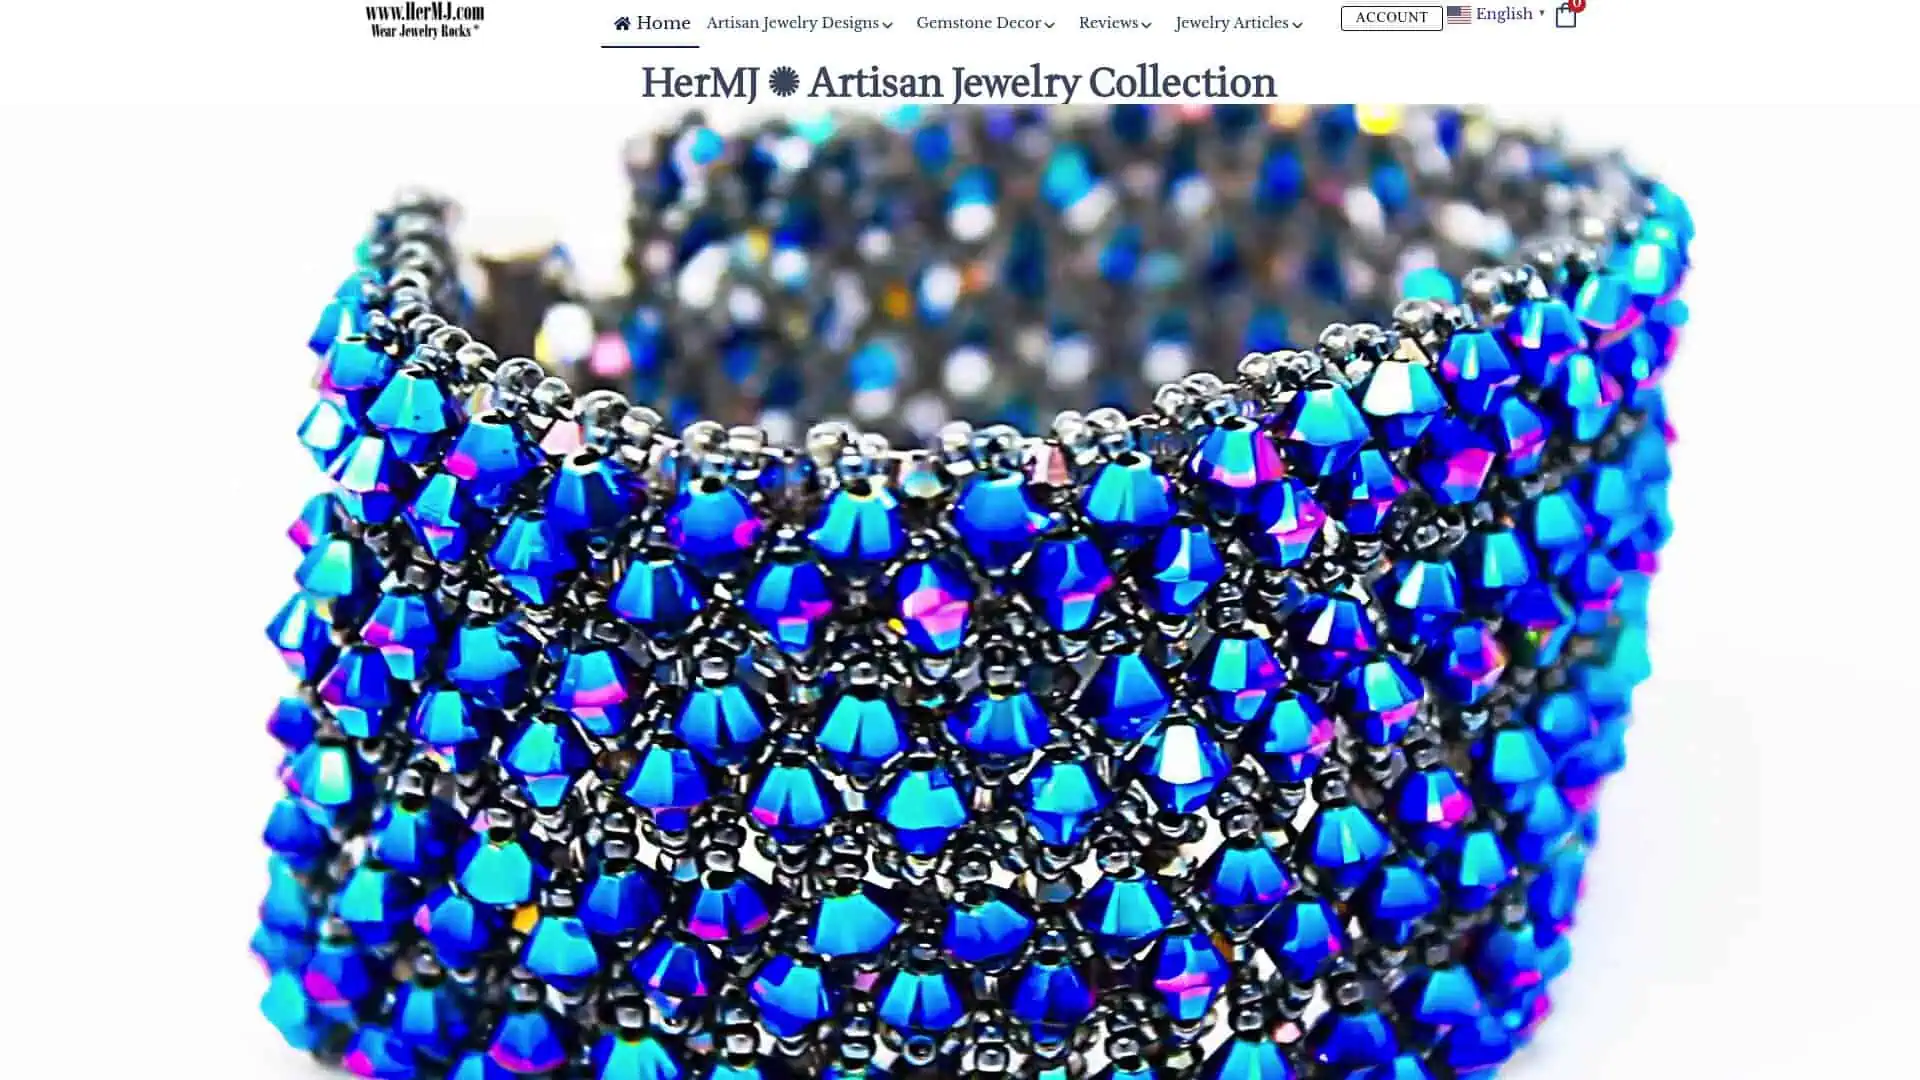
If restoring your current pieces has you thinking about what a well-made pearl strand should look and feel like, HerMJ’s handcrafted freshwater pearl jewelry is worth a look. The pieces are designed with genuine freshwater pearls for real wear and priced to make quality accessible without compromise.
The Elegant Freshwater Pearl Necklace is a good starting point: a clean, versatile strand that pairs beautifully with everyday outfits and responds well to the gentle care routine described throughout this guide.
US orders ship free with no minimum. For international orders, free shipping applies at $150 and above. Browse the full freshwater pearl collection at HerMJ and find a piece that’s made to last.
Sources
These are the resources that informed this guide, each worth bookmarking for ongoing pearl care.
Recommended
- Do Pearls Lose Their Luster If Not Worn? Restore Their Shine
- The Truth About Pearl Durability: A Designer’s Guide to Care
- Style Pearl Jewelry with Everyday Outfits: Easy Looks
- South Sea Pearls: What Collectors Need to Know