

What Is Lapidary Work: A Beginner’s Craft Guide

The Edit
- Lapidary work involves skillfully cutting, shaping, and polishing raw stones into gemstones or decorative items. It emphasizes techniques like tumbling, cabochon cutting, and faceting, which transform unassuming rocks into light-catching, artistic pieces. Understanding stone properties and proper tools is essential for beginners to produce high-quality, natural-looking results.
Lapidary work is defined as the craft of cutting, shaping, and polishing raw stones and minerals into finished gemstones or decorative pieces. Known formally as lapidary art, this practice spans three core disciplines: tumbling, cabochon cutting, and faceting.
Each method transforms rough, unassuming rock into something that catches light, reveals color, and carries genuine artistic intent. Whether you want to create your own artisan pieces or simply appreciate the skill behind a beautifully cut stone, understanding lapidary work changes how you see every gem you encounter.
What is lapidary work, and how does it differ from jewelry making?
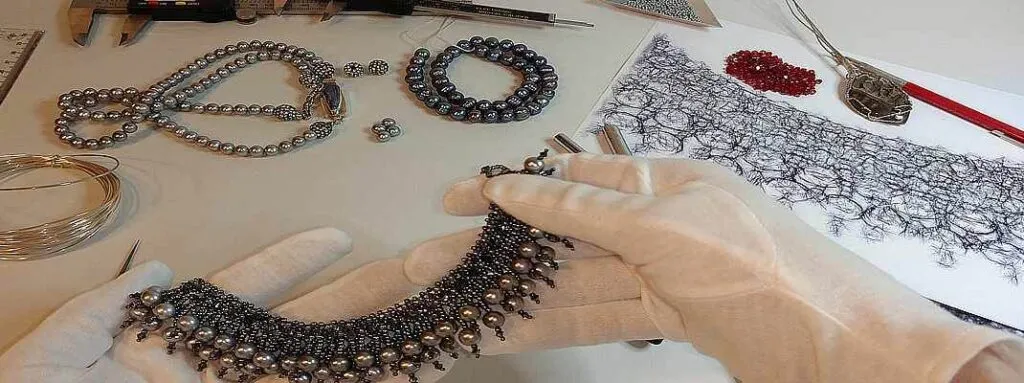
Lapidary work focuses entirely on crafting the gemstone itself, not on setting stones into metal or assembling finished jewelry. Lapidary is gem crafting, not jewelry setting.
A lapidary artist takes a raw piece of agate, turquoise, or labradorite and works it through the stages of grinding, shaping, and polishing until the stone reaches its final form. A jeweler then takes that finished stone and incorporates it into a setting.
This distinction matters because the skills, tools, and knowledge bases are genuinely different. Lapidary work requires understanding mineral science, grit progression, and water cooling. Jewelry making requires metalworking, soldering, and setting techniques.
Many artisan creators practice both, but the crafts are separate disciplines with their own learning curves. If you’re drawn to the idea of handcrafted jewelry techniques, knowing where lapidary ends and jewelry making begins helps you plan your creative path.
What are the main lapidary techniques, and how do they differ?
Five distinct cutting methods form the foundation of lapidary practice: slabbing, trimming, tumbling, cabochon cutting, and faceting. Each serves a different purpose and suits different stones and skill levels.

Tumbling is the most accessible entry point. You place rough stones inside a rotating barrel with water and progressively finer-grit compounds. The barrel tumbles for days or weeks, smoothing and polishing the stones through abrasion.
Tumbling works beautifully with softer, tougher stones like jasper, obsidian, and agate. The results are rounded, smooth, and lustrous, though you don’t control the final shape precisely.
Cabochon cutting produces the classic domed stone with a flat back. A lapidary artist uses a trim saw to cut a slab from rough material, then grinds and polishes the dome on a series of grinding wheels.
Cabochons suit opaque or translucent stones like turquoise, malachite, and moonstone, where the beauty lies in color and pattern rather than light refraction. This is the technique most hobbyists learn after tumbling.
Faceting is the most technically demanding method. It involves cutting multiple flat, geometric surfaces onto a transparent or translucent stone to maximize light reflection and brilliance.
Amethyst, topaz, and quartz are classic faceting candidates. Faceting requires a dedicated faceting machine, precise angle calculations, and a steady hand.
Freeform cutting and carving sit at the artistic end of the spectrum. Here, the lapidary follows the stone’s natural contours and patterns rather than conforming to a standard shape. This approach rewards patience and a deep familiarity with how individual stones behave under the wheel.
| Technique | Best for | Skill level | Typical stones |
|---|---|---|---|
| Tumbling | Smooth, rounded pieces | Beginner | Jasper, agate, obsidian |
| Cabochon cutting | Domed, polished stones | Beginner to intermediate | Turquoise, moonstone, malachite |
| Faceting | Brilliant, geometric cuts | Intermediate to advanced | Amethyst, topaz, quartz |
| Freeform carving | Artistic, organic shapes | Advanced | Labradorite, opal, jade |
Pro Tip: Start with tumbling to build your intuition for how different stones respond to abrasion before investing in a cabochon or faceting setup.
What tools are needed for lapidary work as a beginner?
A beginner’s lapidary setup centers on a few core pieces of equipment. Diamond blades, burnishing powders, and polishing wheels are the workhorses of the craft. You’ll also need a trim saw for cutting slabs, a grinding wheel for shaping, and a polishing disc for the final finish.

Grit progression is the single most important concept to understand before you start. Beginner setups require 4 to 6 diamond grit levels, ranging from 80 grit for initial rough shaping all the way to 1200 grit or finer for the final polish.
Each stage removes the scratches left by the previous, coarser grit. Skipping a stage doesn’t save time. It creates deeper scratches that force you to restart from a coarser level.
Water cooling is non-negotiable. Constant water flow prevents overheating and the micro-fractures that heat causes inside a stone. Most lapidary machines have a built-in water drip or reservoir. If yours doesn’t, you’ll need to add one before you begin cutting.
Here’s a practical starter kit checklist:
- Trim saw with a diamond blade for cutting rough slabs to a workable size
- Grinding wheels in multiple grits (80, 220, 400, 600, 1200) for progressive shaping
- Polishing disc with cerium oxide or aluminum oxide compound for the final luster
- Safety glasses rated for grinding and cutting debris
- Dust mask or respirator rated for fine mineral particles, since silica dust is a genuine health hazard
- Nitrile gloves to protect skin from prolonged water and grit exposure
- Dop sticks and wax for securing cabochons during grinding
Workspace organization matters more than most beginners expect. Keep your grit stages physically separated to avoid cross-contamination, which ruins polish quality. Label your grinding wheels and polishing pads clearly.
Pro Tip: Buy a dedicated lapidary machine like the Gryphon Gryphette or a Lortone trim saw as your first investment. Improvised setups with standard grinding wheels don’t maintain the water flow or speed control that stone work requires.
How does understanding gemstone properties improve your results?
Stone properties dictate technique and tools. Working a stone without knowing its hardness, cleavage, and fracture behavior is the fastest way to ruin a beautiful specimen.
The Mohs hardness scale, which runs from 1 (talc) to 10 (diamond), tells you how resistant a stone is to scratching and abrasion. Softer stones like fluorite (Mohs 4) require gentler grit progressions and lighter pressure. Harder stones like sapphire (Mohs 9) demand diamond-impregnated tools and more time at each grit stage.
Understanding Mohs hardness and cleavage planes before you begin is the difference between a finished gem and a cracked one. Cleavage refers to the directions along which a mineral tends to split cleanly. Feldspar, for example, has two cleavage planes at nearly right angles. Apply pressure in the wrong direction, and the stone splits rather than grinds. Fracture describes how a stone breaks when cleavage isn’t the dominant factor. Conchoidal fracture, common in obsidian and quartz, produces curved, shell-like breaks that a skilled lapidary can actually use to their advantage.
Refractive index matters most in faceting. A stone’s refractive index determines how light bends as it passes through the material, which directly affects how brilliant the finished faceted gem appears. High-refractive stones like zircon and diamond reward precise facet angles with exceptional sparkle.
Lower-refractive stones like quartz still facet beautifully but require different angle calculations to maximize their optical qualities. You can explore how gemstone formation influences these physical properties to deepen your understanding of why each stone behaves differently under the wheel.
How to start lapidary work: a practical workflow for hobbyists
The typical lapidary process for a single cabochon moves through three sequential phases: rough trimming, precision shaping, and polishing. Beginners should expect to spend one to three hours per stone, depending on hardness and complexity. That time investment is part of the craft’s appeal. Each stone demands your full attention.
Follow this sequence to build good habits from the start:
- Select and trim your rough. Use a trim saw to cut a slab from your rough material, then cut a preform shape slightly larger than your intended finished stone. Leave extra material for grinding.
- Grind the shape. Start at 80 grit to establish the basic outline and dome profile. Move to 220 grit to refine the shape and remove the deeper scratches from the first stage.
- Progress through intermediate grits. Work through 400 and 600 grit, spending equal time at each stage. The stone should look progressively smoother and more uniform after each pass with the wheel.
- Pre-polish at 1200 grit. At this stage, the stone should appear almost polished. Any remaining scratches visible here will survive the final polish stage and ruin the finish.
- Polish to final luster. Apply cerium oxide or tin oxide compound on a leather or felt polishing pad. Work in small, consistent circles until the surface reaches a mirror-like finish.
The most common beginner mistake is rushing the grit progression. Skipping grit stages leaves deep scratches that require restarting at coarse levels, adding hours to the process. Another frequent error is overheating the stone by reducing the water flow to see the surface more clearly. Heat causes invisible internal fractures that only reveal themselves when the stone cracks during polishing.
Reading the stone’s natural pattern before you begin shaping is a skill that separates good lapidary work from great lapidary work. Look at the color banding, inclusions, and surface texture of your rough material. Orient your performance to showcase the most interesting pattern at the dome’s apex. Artistry in lapidary emerges when the maker follows the stone’s natural patterns instead of forcing a predetermined shape onto the material.
Pro Tip: Sketch the pattern orientation on your rough with a permanent marker before you cut. It takes 30 seconds and prevents the regret of cutting through the most beautiful part of the stone.
Key takeaways
Lapidary work rewards patience and scientific curiosity in equal measure, and the most successful beginners treat every stone as a teacher before they treat it as raw material.
| Point | Details |
|---|---|
| Lapidary vs. jewelry making | Lapidary crafts the gemstone itself; jewelry making sets it into metal. These are separate skills. |
| Grit progression is non-negotiable | Work from 80 grit to 1200 grit without skipping stages to achieve a scratch-free polish. |
| Water cooling protects your work | Constant water flow prevents heat fractures that can destroy a stone mid-process. |
| Know your stone before you cut | Check Mohs hardness and cleavage planes to choose the right tools and pressure. |
| Read the pattern first | Orient your preform to highlight the stone’s best natural features before grinding begins. |
Why lapidary work is more art than technique
I’ve spent years working with gemstones and watching people discover lapidary for the first time. The moment that always stays with me is when a hobbyist holds up a freshly polished cabochon and sees the color and pattern they suspected was hiding in a dull piece of rough material. That reveal is genuinely moving. It’s not something you can fully anticipate until you experience it yourself.
What I find most interesting about lapidary is that the science doesn’t diminish the artistry. Knowing that labradorite’s iridescence comes from light interference between thin mineral layers makes the finished stone more beautiful to me, not less. Understanding Mohs hardness doesn’t reduce a stone to a number. It tells you how to treat it with respect.
My observation after years of working with artisan gemstones is that the best lapidary artists share one quality: they listen to the stone.
They don’t impose a shape.
They find the shape that was already there. That philosophy, following the material rather than fighting it, produces work that feels alive in a way that forced, mechanical cutting never does. If you’re starting out, give yourself permission to go slowly. The patience you build at the grinding wheel will show up in every piece you make.
— Veronique
Explore artisan gemstone craftsmanship with HerMJ
If learning about lapidary work has deepened your appreciation for what goes into a beautifully crafted gemstone piece, HerMJ has resources that take that appreciation further.

HerMJ’s guide to artisan jewelry craftsmanship walks you through the details that distinguish a mass-produced stone from a hand-finished gem, including the surface quality, polish depth, and pattern orientation produced by skilled lapidary work.
For hobbyists ready to move from understanding to making, HerMJ’s collection of genuine gemstone pieces also shows you what a finished, professionally polished stone looks like in a real jewelry setting. Every piece HerMJ creates starts with the same respect for raw material that good lapidary work demands.
FAQ
What is lapidary work in simple terms?
Lapidary work is the craft of cutting, shaping, and polishing raw stones into finished gemstones or decorative pieces. It includes techniques like tumbling, cabochon cutting, and faceting, each producing different results.
How long does it take to learn lapidary techniques?
Most beginners can produce a polished cabochon within their first few sessions, though consistent quality takes months of practice. The learning curve depends on the technique, with tumbling being the fastest to learn and faceting requiring the most time.
What tools do I need to start lapidary work?
A beginner needs a trim saw, grinding wheels in multiple grit levels (80 to 1200), a polishing disc, safety glasses, a dust mask, and dop sticks. Water cooling equipment is also required to prevent heat damage to stones during grinding.
Does lapidary work require expensive equipment?
Entry-level lapidary setups from brands like Lortone or Gryphon start at a few hundred dollars for a basic trim saw or cabochon machine. Tumbling kits are the most affordable starting point, often available for under $100.
What stones are best for beginner lapidary projects?
Jasper, agate, and obsidian are ideal for beginners because they’re tough, widely available, and respond well to tumbling and cabochon cutting. Avoid stones with strong cleavage, like feldspar or calcite, until you’re comfortable with grit progression and pressure control.
Recommended
- Handcrafted Jewelry Making Techniques for DIY Creators
- What Is Hand Stamped Jewelry: A Beginner’s Guide


